
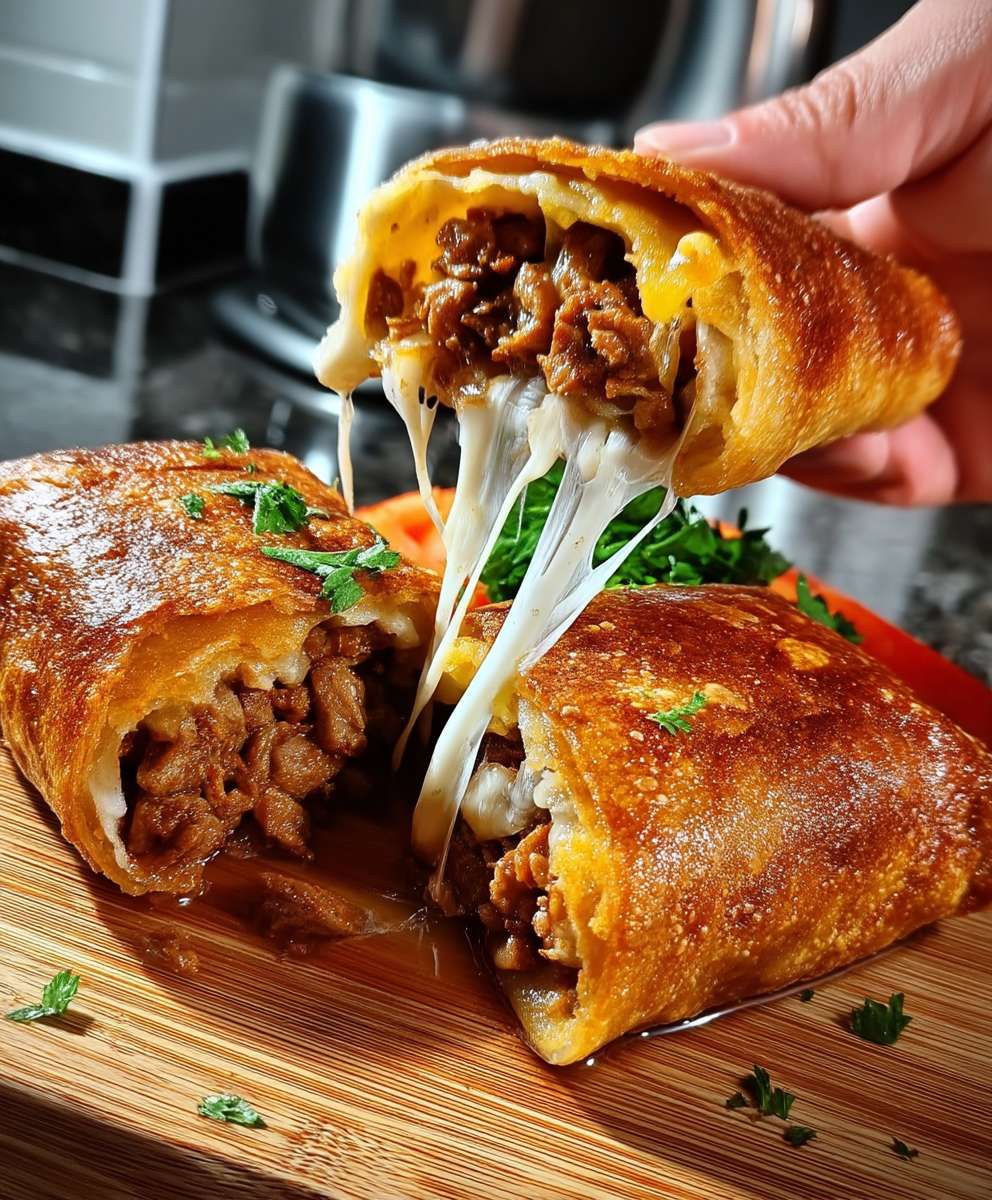
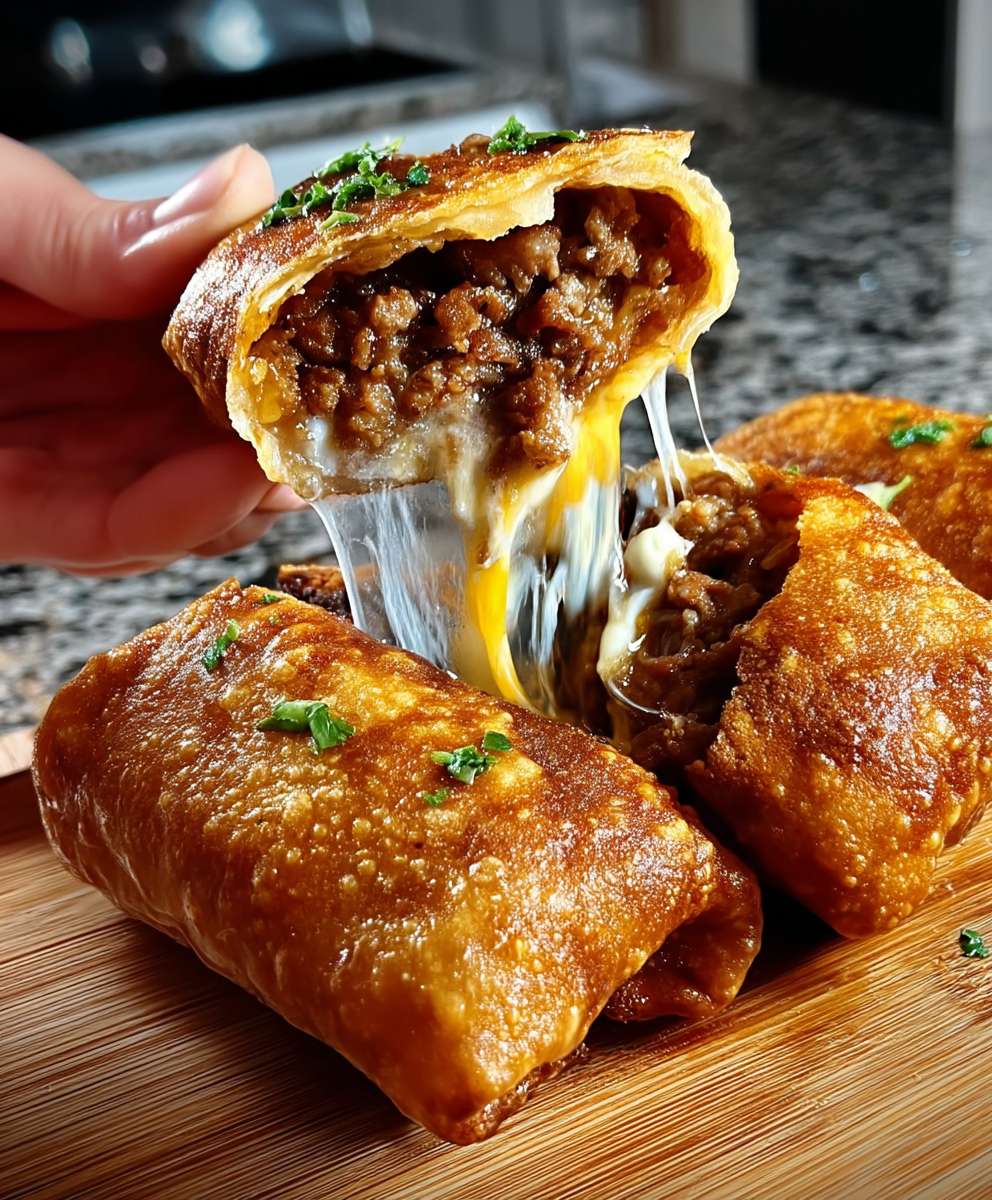
Imagine the golden crisp of a perfectly fried tortilla giving way to a molten avalanche of seasoned ground beef and gooey cheese. This isn’t just dinner; it’s a flavor fiesta, a Tex-Mex marvel ready to transport your taste buds to pure bliss. Dive into the glorious world of homemade Beef and Cheese Chimichangas, where every bite is a crunchy, savory, cheesy dream come true. These aren’t just any fried burritos; they’re an experience, a delightful challenge that rewards your efforts with unmatched deliciousness. Get ready to transform humble ingredients into a spectacular meal that will have everyone clamoring for more of these incredible Beef and Cheese Chimichangas. * This recipe offers a surprisingly easy path to creating restaurant-quality fried burritos right in your own kitchen, perfect for any home chef. * Experience an explosion of robust, savory beef paired with rich, melted cheese, all encased in a satisfyingly crispy tortilla. * The golden-brown exterior and bubbling cheesy interior make for an incredibly appetizing dish that is as beautiful as it is tasty. * These versatile chimichangas are fantastic for family dinners, game day gatherings, or a fun weekend cooking project.
Ingredients for Beef and Cheese Chimichangas
Here’s what you’ll need to make this delicious dish:
- Ground BeefOpt for an 80/20 lean-to-fat ratio for the best flavor and juiciness without excessive grease.
- Large Flour TortillasChoose burrito-sized tortillas, about 10-12 inches, for easy folding and generous fillings.
- Shredded Cheddar CheeseFreshly shredded cheese melts smoother and tastes better than pre-shredded varieties.
- Shredded Monterey Jack CheeseThis cheese adds a creamy texture and mild, buttery flavor that complements the beef perfectly.
- OnionA yellow or white onion, finely diced, provides a foundational aromatic sweetness to the beef filling.
- GarlicMinced fresh garlic is essential for a pungent, savory depth of flavor that defines Tex-Mex cuisine.
- Beef BrothUse a low-sodium beef broth to control the seasoning and add moisture to the filling.
- Tomato PasteA concentrated burst of tomato flavor that enriches the sauce and adds a touch of tang.
- Chili PowderA blend of spices that provides warmth and classic Tex-Mex flavor without being overly spicy.
- CuminEarthy and slightly peppery, cumin is a must-have for authentic Southwestern taste in the beef.
- Smoked PaprikaAdds a beautiful color and a smoky depth that elevates the entire dish, complementing the beef.
- Dried OreganoProvides a subtle herbaceous note, contributing to the complex flavor profile of the filling.
- Salt and Black PepperEssential for seasoning the beef to perfection, bringing out all the other flavors.
- Vegetable OilUsed for frying the chimichangas until they are golden brown and wonderfully crispy.
- Optional ToppingsInclude sour cream, salsa, guacamole, or pickled jalapeños for serving and added flair.
The full ingredients list, including measurements, is provided in the recipe card directly below.
How to Make Beef and Cheese Chimichangas
Follow these simple steps to prepare this delicious dish: Step 1: Prepare the Savory Beef Filling In a large skillet or Dutch oven, brown the ground beef over medium-high heat, breaking it apart with a spoon as it cooks. Once the beef is no longer pink, drain off any excess fat. Add the finely diced onion and minced garlic to the skillet and sauté for 5-7 minutes until the onion softens and becomes translucent. Stir in the tomato paste, chili powder, cumin, smoked paprika, and dried oregano, cooking for another minute until fragrant. Pour in the beef broth, season with salt and black pepper to taste, and bring the mixture to a simmer. Reduce the heat to low and let it cook for 10-15 minutes, allowing the flavors to meld and the liquid to reduce slightly, creating a rich, thick filling. Step 2: Assemble the Chimichangas While the beef filling cools slightly, prepare your workstation. Lay out your large flour tortillas. In a bowl, combine the shredded cheddar and Monterey Jack cheeses. For each chimichanga, place a generous spoonful of the beef filling slightly off-center on a tortilla. Sprinkle a good amount of the mixed cheese over the beef. Fold the sides of the tortilla inward over the filling, then fold the bottom edge up and over the filling, tucking it tightly. Roll the tortilla upwards from the bottom, creating a compact, sealed burrito. Repeat with the remaining tortillas, ensuring each one is snugly wrapped. Step 3: Fry the Chimichangas to Golden Perfection Heat about 2-3 inches of vegetable oil in a deep skillet or Dutch oven over medium-high heat until it reaches 350-375°F (175-190°C). Carefully place 1-2 chimichangas seam-side down into the hot oil, being careful not to overcrowd the pan. Fry for 3-5 minutes per side, or until they are golden brown and wonderfully crispy all over. Use tongs to gently turn them to ensure even cooking and browning. As they finish, remove them from the oil and place them on a wire rack lined with paper towels to drain any excess oil. Step 4: Serve and Enjoy Transfer the golden, crispy Beef and Cheese Chimichangas to plates. Serve immediately with your favorite toppings such as a dollop of cool sour cream, a spoonful of vibrant salsa, creamy guacamole, or a few zesty pickled jalapeños. These delightful pockets of flavor are best enjoyed fresh, when their exterior is at its crispiest and the interior cheese is perfectly melted and gooey.
Tips for Crafting the Ultimate Beef and Cheese Chimichangas
Creating the perfect chimichanga is more art than science, but a few pro tips can elevate your game from “good” to “grand slam.” First, ensure your beef filling isn’t too wet. A soupy filling leads to soggy tortillas, which is a major party foul in the chimichanga world. Let that beef broth simmer down until it’s just coating the meat, not swimming in it. Think “saucy,” not “stewy.” Next, don’t skimp on the cheese. This isn’t the time for calorie counting; it’s the time for a gooey, molten cheese pull that will make your heart sing. A generous sprinkle ensures every bite is a cheesy delight. When it comes to rolling, think of yourself as a culinary origami master. A tight, secure roll is crucial to prevent your delicious filling from escaping during the frying process. If your tortillas feel a little stiff, a quick 10-15 second zap in the microwave can make them more pliable and easier to work with, preventing cracks and tears. Finally, monitor your oil temperature religiously. Too cool, and your chimichangas will absorb too much oil, becoming greasy. Too hot, and they’ll brown too quickly on the outside, leaving a cold interior. A steady 350-375°F is your sweet spot for that perfect golden crisp.
Delicious Variations for Your Chimichanga Adventure
While the classic Beef and Cheese Chimichangas are undeniably fantastic, sometimes a little culinary wanderlust calls. Feel free to experiment with the filling to create your own signature version. For a spicier kick, try adding a pinch of cayenne pepper or a finely diced jalapeño to the beef mixture. If you’re feeling adventurous, swap out some of the ground beef for ground turkey or even shredded chicken for a lighter take. Just be sure to season poultry appropriately. You could also introduce other vegetables into the mix, like bell peppers, corn, or black beans, cooked until tender, to add texture and nutrients. Consider exploring different cheese combinations as well. A blend of Pepper Jack for heat, or even a smoked gouda for an unexpected smoky twist, could be incredibly delicious. Beyond the filling, think about serving innovations. A drizzle of a zesty lime crema, made by whisking lime juice into sour cream, or a homemade chipotle ranch dressing can add another layer of flavor. Don’t be afraid to step outside the traditional Tex-Mex box and infuse international influences; perhaps a touch of adobo seasoning or a different herb blend. The beauty of these crispy wraps lies in their versatility, so let your imagination (and your taste buds) lead the way!
Creative Serving Suggestions to Elevate Your Meal
Your magnificent Beef and Cheese Chimichangas deserve a grand entrance, not just a quiet slide onto a plate. While a dollop of sour cream and a side of salsa are timeless classics, let’s turn up the volume on your serving game. For a truly indulgent experience, consider a generous smothering of zesty queso sauce over the top. The warm, velvety cheese cascading over the crispy shell is a sight to behold and a taste sensation to savor. Another fantastic option is a vibrant fresh pico de gallo, its bright tomatoes, onions, cilantro, and lime juice cutting through the richness of the chimichanga beautifully. To make it a complete meal, pair your chimichangas with a side of fluffy Mexican rice or a simple, refreshing black bean salad. The contrast in textures and temperatures creates a dynamic dining experience. For an extra pop of color and freshness, a sprinkle of chopped fresh cilantro or green onions adds a lovely aromatic garnish. Don’t forget the heat! A dash of your favorite hot sauce or a side of pickled jalapeños can provide that satisfying fiery kick that true Tex-Mex enthusiasts adore. And for those who love a bit of crunch, a sprinkle of toasted pumpkin seeds (pepitas) can add an unexpected but delightful textural element.
Storing and Reheating Your Beef and Cheese Chimichangas
Let’s face it, sometimes you get ambitious, or perhaps you’re planning ahead for future cravings. Storing your leftover Beef and Cheese Chimichangas correctly ensures you can enjoy them again without sacrificing much of their glorious crispiness. Once cooled completely, place any uneaten chimichangas in an airtight container. They will keep well in the refrigerator for up to 3-4 days. While they won’t be quite as crispy as fresh, the flavor will still be fantastic. When it comes to reheating, avoid the microwave if a crispy texture is your goal, as it tends to make them soggy. The best method for reheating is in an oven or air fryer. Preheat your oven to 350°F (175°C) and bake the chimichangas for 10-15 minutes, or until heated through and the exterior has re-crisped. If using an air fryer, set it to 350°F (175°C) and cook for 5-8 minutes, flipping halfway through. This method usually yields a surprisingly good crispness. You can also freeze assembled, unfried chimichangas for later. Wrap them individually in plastic wrap, then place them in a freezer-safe bag. They can be fried from frozen, simply adding a few extra minutes to the cooking time, making them a perfect make-ahead meal.
Frequently Asked Questions About Beef and Cheese Chimichangas
Can I bake these chimichangas instead of frying them?
Absolutely! For a slightly lighter version, you can bake your Beef and Cheese Chimichangas. Preheat your oven to 400°F (200°C). Lightly brush the chimichangas with vegetable oil on all sides and place them on a baking sheet. Bake for 20-25 minutes, flipping halfway through, until they are golden brown and crispy. The texture will be different from fried, but still delicious.
What kind of ground beef is best for chimichangas?
An 80/20 lean-to-fat ratio for ground beef is generally recommended. This provides enough fat for rich flavor and moisture without making the filling overly greasy. If you use leaner beef, you might need to add a touch more beef broth to keep the filling from drying out.
How do I prevent my chimichangas from falling apart while frying?
The key to preventing unraveling is a tight roll and ensuring the seam side is placed down first when you put them into the hot oil. This helps seal the tortilla. You can also use a small amount of water to moisten the edge of the tortilla before the final fold to act as a “glue.”
Can I prepare the beef filling ahead of time?
Yes, you can absolutely prepare the savory beef filling a day or two in advance. Store it in an airtight container in the refrigerator. When you’re ready to assemble, simply reheat the filling gently on the stovetop before wrapping it into the tortillas. This makes meal prep even easier.
What if I don’t have all the spices listed?
While the listed spices create an authentic flavor, you can substitute a good quality store-bought Tex-Mex or taco seasoning blend in a pinch. Start with a smaller amount and adjust to your taste. The aim is a flavorful, well-seasoned beef filling.
Ah, the chimichanga! Not just a meal, but an adventure in flavor, a crispy, golden treasure chest of savory beef and melty cheese, ready to conquer even the most formidable hunger pangs. My first encounter with a chimichanga was less “culinary revelation” and more “accidental masterpiece.” I was attempting to impress a new group of friends with my ‘culinary prowess’ (which, at the time, mostly involved microwaving leftovers creatively). I over-fried a batch of burritos, and instead of admitting defeat, I declared them “experimental crispy beef pockets.” To my astonishment, they were a hit! The crunchy shell, the juicy filling – it was a happy accident that became a household legend. Ever since, I’ve been on a quest to perfect this delightful dish, turning those happy accidents into intentional acts of deliciousness. Get ready to embark on your own journey to create the ultimate Beef and Cheese Chimichangas, a dish so good it might just inspire its own accidental legend in your kitchen.
The Humble Beginnings of a Fried Marvel
The origin story of the chimichanga is as debated as whether a hotdog is a sandwich. Some say it was an accidental drop into a deep fryer, a “chimi” (a Spanish swear word, supposedly) escaping the lips of an exasperated cook. Others claim it was a deliberate culinary invention, a clever way to serve a burrito with an irresistible crunch. Whatever its true history, one thing is certain: this dish has become a beloved staple, gracing tables with its golden-brown perfection and rich, hearty filling. It’s the kind of comfort food that wraps you in a warm hug, then gives you a satisfying crunch, making it perfect for family dinners, game nights, or just a Tuesday when you need a little extra joy.
Gathering Your Delicious Arsenal: Ingredients
Creating spectacular Beef and Cheese Chimichangas begins with sourcing quality ingredients. Think of yourself as a culinary superhero, assembling your tools for a delicious mission. We’re talking about succulent ground beef, rich and flavorful, perfectly seasoned to be the star of the show. Then, we need tortillas – not just any tortillas, but large, pliable ones that can withstand the rigors of stuffing and frying without a single tear. And the cheese? Oh, the cheese! A blend of Monterey Jack and cheddar, because why choose when you can have both? This combination melts beautifully, creating those irresistible, gooey pockets of deliciousness inside every bite. Forget bland, watery fillings; we’re aiming for a flavor explosion.
- 1 tablespoon olive oil
- 1.5 pounds ground beef (80/20 lean for best flavor)
- 1 large onion, chopped
- 2 cloves garlic, minced
- 1 (14.5 ounce) can diced tomatoes, undrained
- 1 (4 ounce) can chopped green chilies, undrained
- 1 teaspoon ground cumin
- 1/2 teaspoon chili powder
- 1/4 teaspoon smoked paprika
- Salt and freshly ground black pepper to taste
- 1 cup beef broth or water
- 12 large flour tortillas (burrito size)
- 2 cups shredded Monterey Jack cheese
- 1 cup shredded sharp cheddar cheese
- Vegetable oil or canola oil, for frying
- Optional toppings: shredded lettuce, diced tomatoes, sour cream, guacamole, salsa
Crafting the Hearty Beef Filling: A Flavor Fiesta
The secret to an unforgettable chimichanga lies in its filling. This isn’t just ground beef; it’s a symphony of flavors, a juicy, seasoned concoction that will make your taste buds sing. Start by browning your ground beef in a skillet over medium-high heat. Break it apart with a spoon as it cooks. Once it’s nicely browned, drain any excess fat. Nobody wants a greasy chimichanga, unless it’s on purpose for extreme sports. Add the chopped onion and sauté until it softens and becomes translucent, mingling its sweet aroma with the savory beef. Next, toss in the minced garlic and cook for another minute until fragrant – be careful not to burn it, burnt garlic is a sad affair.
Now, it’s time to introduce the flavor powerhouses: diced tomatoes, chopped green chilies, ground cumin, chili powder, and smoked paprika. Stir everything together, letting the spices awaken and coat the beef and vegetables. Pour in the beef broth, bring the mixture to a simmer, then reduce the heat to low. Let it gently bubble away for about 15-20 minutes, allowing the flavors to meld and deepen. The liquid should mostly absorb, leaving you with a rich, thick, and incredibly fragrant filling. Season with salt and pepper to perfection. This filling is so good, you might be tempted to eat it straight from the pan with a spoon. Resist the urge, my friend, the chimichangas await!
Assembling Your Golden Treasures: The Art of the Wrap
With your glorious beef filling ready and your cheese patiently waiting, it’s time for the assembly line. This is where you transform simple ingredients into those glorious, crispy Beef and Cheese Chimichangas. Warm your flour tortillas slightly; a quick zap in the microwave or a few seconds on a dry skillet will make them more pliable and less prone to tearing. Lay a tortilla flat on a clean surface. Spoon about 1/2 cup of the beef mixture down the center, leaving space at the ends. Sprinkle a generous amount of both Monterey Jack and cheddar cheese over the beef. This ensures every bite gets that delightful cheesy pull.
Now comes the wrapping, a delicate dance that ensures your filling stays put during its hot oil plunge. Fold the short sides of the tortilla over the filling, then fold one of the long sides tightly over the filling, tucking it in as you go. Roll it up snugly, like a culinary sleeping bag for your delicious filling. You want a firm, compact package. If it feels loose, your chimichanga might unravel in the fryer, and nobody wants a sad, deconstructed chimichanga. Repeat with the remaining tortillas and filling. You’ll soon have a line of perfectly wrapped parcels, eagerly awaiting their transformation into crispy, golden perfection.
Frying to Crispy Perfection: The Golden Rule
Frying the chimichangas is the moment of truth, where they achieve their signature golden crispiness. Pour about 2-3 inches of vegetable or canola oil into a large, heavy-bottomed pot or Dutch oven. Heat the oil to 350°F (175°C). If you don’t have a thermometer, drop a tiny piece of tortilla into the oil; it should sizzle immediately and turn golden within a minute. Be cautious and do not overcrowd the pot; fry only 2-3 chimichangas at a time to maintain the oil temperature and ensure even cooking. Overcrowding leads to soggy chimichangas, and we’ve already established that sogginess is a foe.
Carefully place the wrapped chimichangas into the hot oil, seam-side down first to seal them. Fry for 3-4 minutes per side, or until they are deeply golden brown and beautifully crispy all over. Use tongs to gently turn them, ensuring an even crust. Once they reach that perfect golden hue, carefully remove them from the oil and place them on a wire rack set over a baking sheet lined with paper towels. This allows any excess oil to drain off, keeping them wonderfully crisp. This step is crucial; nobody appreciates an oily chimichanga, no matter how delicious the filling. Serve your Beef and Cheese Chimichangas hot with your favorite toppings.
Perfecting the Cooking Process
To achieve peak chimichanga perfection, brown the seasoned ground beef first, then sauté the aromatics. Simmer the beef mixture thoroughly to intensify flavors before assembly. Fry the chimichangas in batches, maintaining optimal oil temperature, to ensure an evenly golden, crispy exterior without greasiness. This sequence guarantees maximum flavor and ideal texture for your Beef and Cheese Chimichangas.
Add Your Touch
Elevate your Beef and Cheese Chimichangas with creative twists! Swap ground beef for shredded chicken or lamb. Experiment with smoked cheddar or pepper jack cheese for extra kick. Add corn, black beans, or finely diced bell peppers to the filling. A splash of lime juice in the beef mixture brightens flavors, or a pinch of chipotle powder adds smoky heat.
Storing & Reheating
Store leftover chimichangas in an airtight container in the refrigerator for up to 3 days. To reheat, bake them in an oven or air fryer at 350°F (175°C) for 10-15 minutes until crispy and heated through. Avoid microwaving, as it can make them soggy, losing their delightful crunch.
- Ensure your tortillas are slightly warm and pliable before rolling; this prevents tearing and makes for a tighter, more secure wrap, crucial for perfectly intact chimichangas.
- Do not overcrowd the frying pan. Frying in small batches maintains the oil temperature, leading to a consistently crispy, golden exterior on every Beef and Cheese Chimichanga.
- Let the beef filling cool slightly before assembling. A cooler filling prevents the tortillas from getting soggy and makes them easier to handle, ensuring a firm, well-structured chimichanga.
I remember one family reunion where I made a huge batch of these Beef and Cheese Chimichangas. My notoriously picky cousin, who usually just nibbled on salads, devoured three of them! He even asked for the recipe. That day, I knew I had unlocked a true crowd-pleaser.
Serving Suggestions & Topping Extravaganza
Your beautiful, crispy Beef and Cheese Chimichangas are ready for their grand debut! But what’s a star without its supporting cast? The right toppings can elevate this dish from delicious to absolutely divine. Think of it as painting the final strokes on your culinary masterpiece. A dollop of cool sour cream provides a creamy counterpoint to the rich, savory filling. Freshly made guacamole, with its vibrant green hue and creamy texture, adds a touch of luxury. And of course, a tangy salsa is non-negotiable, offering a burst of freshness and a little zing to cut through the richness. Don’t forget shredded lettuce and diced tomatoes for color and freshness.
You can also consider a sprinkle of fresh cilantro, a squeeze of lime juice, or even a drizzle of a mild cheese sauce for an extra layer of indulgence. For those who enjoy a little heat, a dash of hot sauce or sliced jalapeños can really kick things up a notch. Lay out an array of options and let everyone customize their chimichanga experience. It turns dinner into an interactive, festive event, where every bite is tailored to individual preference. Whether you go classic or adventurous, these Beef and Cheese Chimichangas are sure to be the star of any meal.
Why These Beef and Cheese Chimichangas Reign Supreme
There’s something inherently joyful about a well-made chimichanga. Perhaps it’s the satisfying crunch that gives way to a warm, savory, and cheesy interior. Maybe it’s the versatility, allowing for endless customization to suit any palate. Or perhaps it’s the sheer comfort it brings, a dish that feels like a warm hug on a plate. This recipe for Beef and Cheese Chimichangas isn’t just about cooking; it’s about creating an experience, a moment of culinary bliss that brings people together. It’s a dish that inspires smiles, satisfies cravings, and leaves everyone feeling utterly content. They’re hearty, flavorful, and frankly, a whole lot of fun to make and eat.
So, gather your ingredients, fire up your skillet, and get ready to create some kitchen magic. Don’t be intimidated by the frying; with a little care, you’ll achieve that perfect golden crust that dreams are made of. This recipe is your ticket to a world of crispy, cheesy, beefy goodness. Trust me, once you’ve tasted homemade Beef and Cheese Chimichangas, there’s no going back. Prepare for rave reviews, requests for seconds, and perhaps, a few accidental legends of your own. Happy cooking, and may your chimichangas always be perfectly crisp!
Conclusion for Beef and Cheese Chimichangas
Embarking on the journey of making your own Beef and Cheese Chimichangas is more than just cooking; it’s an invitation to flavor, fun, and culinary triumph. This recipe delivers a symphony of savory beef, melted cheese, and a satisfyingly crispy shell that promises to delight every palate. Whether you’re whipping them up for a lively family dinner or a festive get-together, these chimichangas are guaranteed to be a hit, leaving everyone asking for seconds. So, roll up your sleeves, gather your ingredients, and prepare to create a memorable meal that’s both deeply satisfying and wonderfully easy to personalize. Enjoy every delicious, golden-brown bite!
PrintBeef and Cheese Chimichangas

Experience juicy seasoned ground beef and gooey Monterey Jack, expertly rolled into warm tortillas. Includes complete cooking instructions and detailed nutritional breakdown.
- Prep Time: 15 minutes
- Cook Time: 20 minutes
- Total Time: 35 minutes
- Yield: 4 servings 1x
- Method: Stovetop
- Cuisine: American
Ingredients
- 1 pound ground beef
- 8 large (10-inch) flour tortillas
- 1.5 cups shredded Monterey Jack or Mexican blend cheese
- 1 small onion, finely diced
- 2 cloves garlic, minced
- 1 (1 oz) packet taco seasoning mix
- 1/4 cup water
- 3–4 cups vegetable oil (for frying)
Instructions
- Step 1: Brown the ground beef in a large skillet over medium-high heat. Drain any excess fat. Add the finely diced onion and minced garlic, cooking until the onion softens, about 3-5 minutes. Stir in the taco seasoning mix and 1/4 cup water, simmering until the liquid is mostly absorbed and the beef is well coated, then remove from heat.
- Step 2: Warm the flour tortillas slightly to make them more pliable. You can do this by heating them in a microwave for 15-20 seconds or quickly in a dry skillet over medium heat. Lay a tortilla flat, spoon about 1/3 cup of the beef filling and 2-3 tablespoons of shredded cheese slightly off-center. Fold the sides of the tortilla over the filling, then roll it up tightly from the bottom to create a compact package. Repeat with remaining tortillas and filling.
- Step 3: In a large, deep pot or Dutch oven, heat 3-4 cups of vegetable oil over medium-high heat until it reaches 350-375°F (175-190°C). If you don't have a thermometer, a small piece of tortilla should sizzle immediately when dropped in.
- Step 4: Carefully place 2-3 chimichangas into the hot oil, seam-side down, making sure not to overcrowd the pot. Fry for 3-5 minutes, turning occasionally, until they are golden brown and crispy on all sides.
- Step 5: Using tongs, carefully remove the cooked chimichangas from the oil and place them on a plate lined with paper towels to drain any excess oil. Serve immediately with your favorite toppings like sour cream, salsa, or guacamole.
Notes
- Keep any leftover chimichangas fresh by storing them in an airtight container in the refrigerator for up to three days.
- To recapture that delightful crispiness, reheat your chimichangas in an air fryer or oven at 350°F (175°C) for 10-15 minutes until golden and heated through, avoiding the microwave if possible.
- Serve these delicious chimichangas with a vibrant array of toppings like fresh salsa, a dollop of cool sour cream, creamy guacamole, and a sprinkle of chopped cilantro to truly complete the experience.
- A key chef's tip for flawless chimichangas is to ensure your tortillas are warmed and pliable, then roll them very tightly after filling to prevent bursting and ensure an even, golden crispness during frying.
Nutrition
- Serving Size: 1 large chimichanga
- Calories: 720
- Sodium: 1050mg
- Fat: 48g
- Saturated Fat: 22g
- Trans Fat: 0.8g
- Protein: 3g
FAQs
What makes homemade Beef and Cheese Chimichangas so special compared to takeout?
Crafting your own delicious Beef and Cheese Chimichangas at home elevates them far beyond any restaurant version. You get to control every ingredient, ensuring only the freshest, high-quality beef and the perfect blend of cheeses make it into your crispy creation. Imagine biting into a perfectly golden-brown tortilla, bursting with a savory, seasoned beef filling and gooey melted cheese, all made precisely to your taste. Plus, there’s an undeniable joy and satisfaction that comes from creating such a delightful meal from scratch, transforming a simple evening into a festive culinary adventure. It’s an experience you simply can’t get from a takeout bag.
Can I prepare chimichangas ahead of time for a party?
Absolutely! Chimichangas are fantastic for make-ahead meal prep, especially when you’re hosting a gathering. You can assemble them completely, ready for their final crisping, and then store them in the refrigerator for up to 24 hours. For even longer storage, wrap them tightly individually and freeze them for up to a month. When it’s party time, you can bake or air-fry them directly from the fridge or freezer (adding a little extra cooking time if frozen). This convenient prep method means less stress on the day of your event, allowing you to enjoy your guests while still serving up an incredibly fresh and satisfying meal.
What are the best toppings and sides to serve with Beef and Cheese Chimichangas?
Elevate your Beef and Cheese Chimichangas experience with an array of vibrant toppings and complementary sides. A dollop of cool sour cream and a generous spoonful of fresh guacamole are always classic winners, adding creamy textures and rich flavors. Don’t forget a zesty salsa or homemade pico de gallo for a burst of freshness and a slight kick. Shredded crisp lettuce or a sprinkle of fresh cilantro can add a lovely green counterpoint. For side dishes, fluffy Mexican rice and hearty black beans round out the meal perfectly, making it a complete and utterly satisfying feast that everyone will rave about.
How do I achieve that perfectly crispy shell without deep frying?
Achieving a wonderfully crispy shell for your chimichangas without the mess and oil of deep frying is surprisingly simple! The air fryer is your best friend here. A light spray of cooking oil before air frying at a medium-high temperature will give you an incredibly golden and crunchy exterior, rivaling traditional frying. Alternatively, baking them in a hot oven also works wonders. Place your assembled chimichangas on a baking sheet, brush lightly with oil, and bake until they turn a beautiful golden brown and are deliciously crisp. These methods offer a fantastic balance of health and indulgence, ensuring a delightful texture every time.


Leave a Comment